


基于香橙派AI Studio的语音聊天机器人
发表于: 2025/08/05
1. 引言
本案例基于香橙派AI Studio 176T 48GB扩展坞硬件平台,通过MindIE推理加速套件部署DeepSeek-R1-Distill-Qwen-14B轻量化模型,构建了支持英文语音交互的Web端智能对话系统。本案例的实验环境请参考在线课程:《开箱实测OrangePi AI Studio》
2.实验环境
硬件配置:
| 配件名称 | 描述 | 规格要求 |
|---|---|---|
| 香橙派AI Studio | 提供AI算力 | - 算力:176 TOPS INT8 - 内存:48GB/96GB |
| 电脑主机 | 运行系统并连接香橙派 | - x86_64架构 - 16线程+ CPU - 64GB+内存 - USB4/雷电4(支持PCIe隧道,40Gbps) - 系统:Ubuntu 22.04(Linux 5.15内核) |
| USB4数据线 | 连接香橙派和电脑 | - 40Gbps带宽 - 雷电4兼容 - 支持PCIe隧道 |
| 显示器、鼠标、键盘、USB耳机、HDMI连接线 | 连接电脑,提供人机交互 | - HDMI显示器 - USB键鼠 - USB耳机 |
系统环境:
| 名称 | 版本 |
|---|---|
| Ubuntu系统 | 22.04.5-desktop-amd64 |
| Ascend-cann-toolkit | 8.0.0.beta1 |
| Ascend-cann-kernels-310* | 8.0.0.beta1 |
| Ascend-mindxsdk-mxvision | 6.0.0.SPC1 |
| python3 | 3.10.12 |
| MindIE docker镜像 | 1.0.0-300I-Duo-py311-openeuler24.03-lts |
| torch | 2.1.0+cpu |
| torch_npu | 2.1.0.post10 |
请参考在线课程:《开箱实测OrangePi AI Studio》,完成上述软件环境的安装,并完成以下MindIE的环境配置:
- 安装docker软件
- 下载昇腾docker镜像
- 创建docker镜像
- 打修复补丁
3.实验步骤
3.1 DeepSeek-R1-Distill-Qwen-14B测试案例
3.1.1 下载DeepSeek-R1-Distill-Qwen-14B模型权重
步骤 1 在物理机上,进入root用户执行:
在物理机上,下载DeepSeek-R1-Distill-Qwen-14B模型权重,将其放到/models目录下。
su root
cd /models
apt install -y git-lfs
git clone --depth=1 https://modelers.cn/XLRJ/DeepSeek-R1-Distill-Qwen-14B
git clone https://modelers.cn/XLRJ/DeepSeek-R1-Distill-Qwen-14B.git
步骤 2 校验模型权重文件完整性:
cd /models/DeepSeek-R1-Distill-Qwen-14B生成官方校验文件:
git lfs ls-files -l | awk '{print $1" "$3}' > large_files.sha256比对本地文件哈希值:
sha256sum -c large_files.sha256输出OK:文件完整。输出FAILED:文件损坏需重新下载。
3.1.2 物理机加SWAP内存
请保证物理内存加SWAP内存大于64GB,不然转换权重和执行推理程序时会由于内存不够而退出。
步骤 1 在物理机上查询总内存大小,也就是“total”相加。
free -h
步骤 2 如果内存不够,加64GB SWAP内存
以下是增加64GB SWAP内存的示例代码。
*注意:请在物理机上执行,不支持在docker容器内执行。
fallocate -l 64G /swap_model
chmod 600 /swap_model
mkswap /swap_model
swapon /swap_model

# 使用完成后可以使用下面的命令释放空间
swapoff /swap_model
rm /swap_model
3.1.3 进入docker容器
步骤 1 查看docker容器的状态
使用docker ps -a 命令查询docker容器的信息,其中STATUS表示容器状态,Exited为关闭状态,Up为开启状态。
docker ps -a输出示例:
CONTAINER ID   IMAGE         COMMAND       CREATED              STATUS                             PORTS     NAMES
e1e2d0e10b96   74a5b9615370   "bash"      54 minutes ago       Exited (137) 8 seconds ago                    mindIE
步骤 2 启动docker容器
如果容器状态为Exited,需要先启动docker;如果容器状态为Up,则可以直接进入docker容器。
docker start mindIE步骤 3 进入docker容器
docker exec -it mindIE bash3.1.4 设置docker的环境变量
步骤 1 进入docker容器,使用下面的命令使能CANN和MindIE相关的环境变量:
source /usr/local/Ascend/ascend-toolkit/set_env.sh
source /usr/local/Ascend/nnal/atb/set_env.sh
source /usr/local/Ascend/mindie/set_env.sh
source /usr/local/Ascend/atb-models/set_env.sh
步骤 2 使用chown命令将/models/DeepSeek-R1-Distill-Qwen-14B目录及其所有文件的所有者和组更改为root用户和root组:
chown root:root -R /models/DeepSeek-R1-Distill-Qwen-14B3.1.5 DeepSeek-R1-Distill-Qwen-14B模型推理
步骤 1 在docker内,推理DeepSeek-R1-Distill-Qwen-14B模型的命令如下所示:
cd $ATB_SPEED_HOME_PATH
torchrun --nproc_per_node 1 --master_port 20037 -m examples.run_pa --model_path /models/DeepSeek-R1-Distill-Qwen-14B/ --max_output_length 256
步骤 2 推理成功后,在输出的最后,可以找到Question和Answer,结果如下所示:

3.2 MindIE Service的使用方法
下面以DeepSeek-R1-Distill-Qwen-14B模型为例,演示MindIE Service的使用方法。其他模型的只需要修改MindIE 配置中的modelWeightPath参数,其余步骤一致。
3.2.1 修改配置文件
步骤 1 进入docker环境下的mindie-service文件夹,修改conf/config.json中的配置:
cd /usr/local/Ascend/mindie/latest/mindie-service
vim conf/config.json
以下列出的是必须修改的配置项,其他的参数请参考官方文档。
- “httpsEnabled”我们设置成false,否则需要先导入https相关的证书才能启动MindIE Server服务。
- "npuDeviceIds" 因为我们只有一个推理Device,因此设置为0。
- “modelName”是后续调用MindIE Server服务时会用到的模型名称。
- “modelWeightPath”参数是模型路径,和上一步中推理时的模型路径保持一致,以下是DeepSeek-R1-Distill-Qwen-14B的例子。
- "worldSize" 因为我们只有一个推理Device,因此设置为1。
- "trustRemoteCode"设置为true,信任远程代码,否则有些模型无法启动。
例如:
"httpsEnabled" : false,
"npuDeviceIds" : [[0]],
"modelName" : "DeepSeek-R1-Distill-Qwen-14B",
"modelWeightPath" : "/models/DeepSeek-R1-Distill-Qwen-14B",
"worldSize" : 1,
"trustRemoteCode" : true
注意:确保“ipAddress”为“127.0.0.1”,“port” 字段为“1025”。
步骤 2 修改模型目录下的config.json文件的权限为640,否则无法启动server服务:
chmod 640 /models/DeepSeek-R1-Distill-Qwen-14B/config.json3.2.2 启动MindIE Server服务
./bin/mindieservice_daemon如果最后输出Daemon start success! 说明MindIE Server服务启动成功。
3.2.3 测试MindIE Server服务
MindIE Server服务启动后,可以使用curl命令测试下服务是否能正常使用。
新建终端,在物理机的普通用户输入以下命令进行测试:
sudo apt update && sudo apt install -y curl
curl -w "\ntime_total=%{time_total}\n" \
     -H "Accept: application/json" \
     -H "Content-type: application/json" \
     -X POST \
     -d '{
         "inputs": "I love Beijing, because",
         "stream": false
     }' \
     http://127.0.0.1:1025/generate
输出示例:
{"generated_text":"it is a city of contrasts. It is a city of the old and the new, the"}
time_total=1.211029
3.3 语音聊天机器人
这是一个通过调用MindIE Server 服务化接口和SpeechT5、whisper 模型实现的聊天机器人案例。本案例支持多语言语音输入,但受TTS 模型限制,目前只支持英语语音输出。
3.3.1 下载语音聊天机器人代码包
首先下载案例代码到运行推理服务的电脑的“/data”目录。
cd /data/
git clone https://gitee.com/orangepi-xunlong/speech_chat_robot.git
3.3.2 下载案例需要的模型:
cd /models
git clone --depth=1 https://modelers.cn/XLRJ/whisper-large-v3-turbo
git clone --depth=1 https://modelers.cn/XLRJ/cmu-arctic-xvectors
git clone --depth=1 https://modelers.cn/XLRJ/speecht5_tts
git clone --depth=1 https://modelers.cn/XLRJ/speecht5_hifigan
3.3.3 安装依赖
cd /data/speech_chat_robot
pip3 install -r requirements.txt -i https://mirrors.huaweicloud.com/repository/pypi/simple
pip3 install \
  "accelerate==1.9.0" \
  "numpy==1.26.4" \
  "pyarrow==10.0.0" \
  "datasets==2.14.6" \
  -i https://pypi.tuna.tsinghua.edu.cn/simple \
  --trusted-host pypi.tuna.tsinghua.edu.cn
apt install -y ffmpeg
3.3.4 设置CANN环境变量
source /usr/local/Ascend/ascend-toolkit/set_env.sh3.3.5 生成https证书
这里受浏览器安全限制,需要使用https 协议才能正常调用麦克风权限。
执行以下命令在案例根目录生成https 证书:
openssl req -x509 -newkey rsa:4096 -keyout key.pem -out cert.pem -sha256 -days 365 -nodes执行后会有一些需要手动输入的问题,直接回车就可以:
Country Name (2 letter code) [AU]:
State or Province Name (full name) [Some-State]:
Locality Name (eg, city) []:
Organization Name (eg, company) [Internet Widgits Pty Ltd]:
Organizational Unit Name (eg, section) []:
Common Name (e.g. server FQDN or YOUR name) []:
Email Address []:
生成完成后,会在当前目录下生成两个pem 格式的证书文件:
ls输出:
cert.pem integrated_webui.py key.pem llm_infer.py requirements.txt3.3.6 启动主程序
python3 integrated_webui.py输出:

3.3.7 浏览器打开网址“https://127.0.0.1:7860”
复制终端输出的“https://{ip}:7860”网址,如上图中的“https://127.0.0.1:7860”,在浏览器打开。
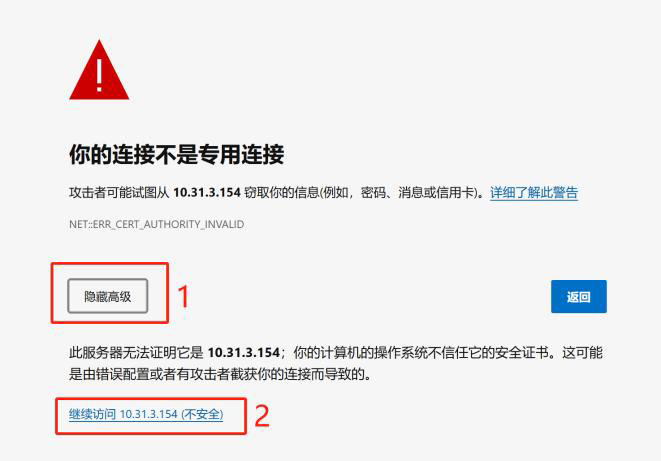
这里可能会出现类似下图的警告,以edge 浏览器为例,我们依次点击“高级”,“继续访问10.31.3.154(不安全)”即可。
3.3.8 使用语音聊天机器人
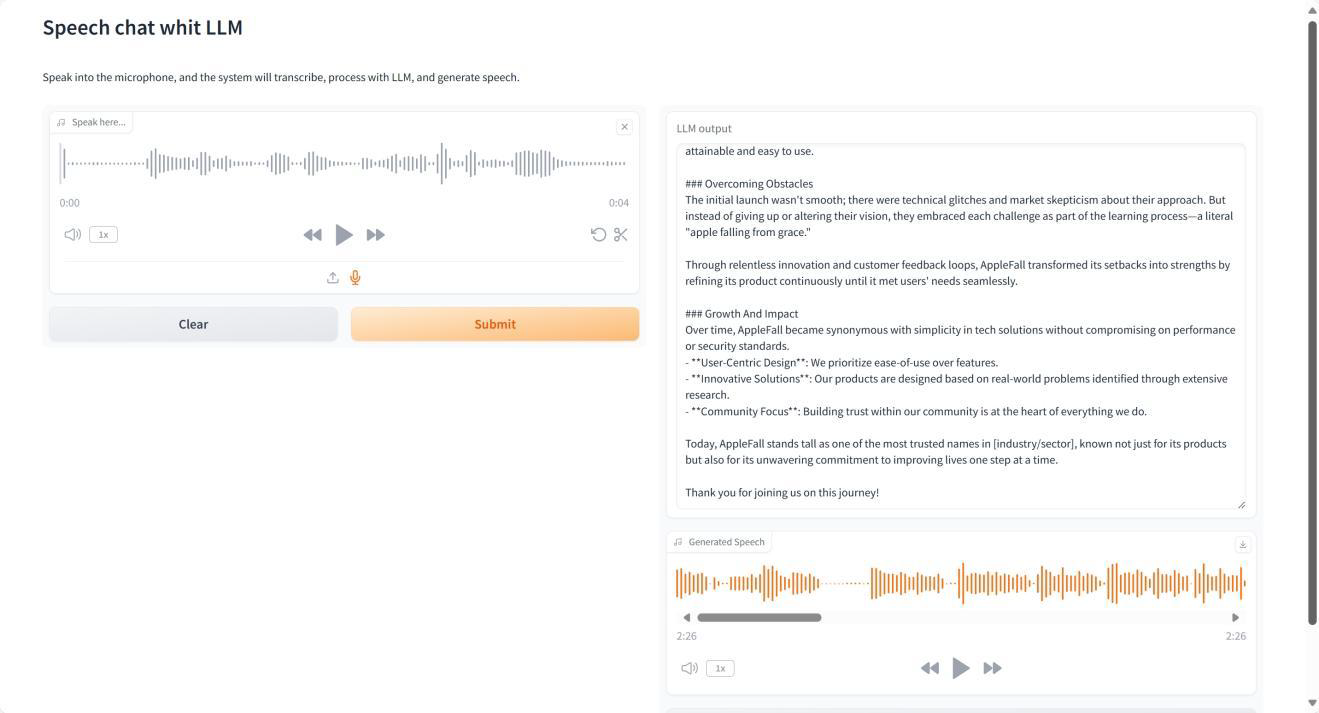
步骤一 打开后我们可以看到下面这个页面,左侧是语音输入界面,我们可以选择上传音频或者使用电脑的麦克风录制音频。右侧上面是大模型的输出,下面是TTS 模型输出的语音: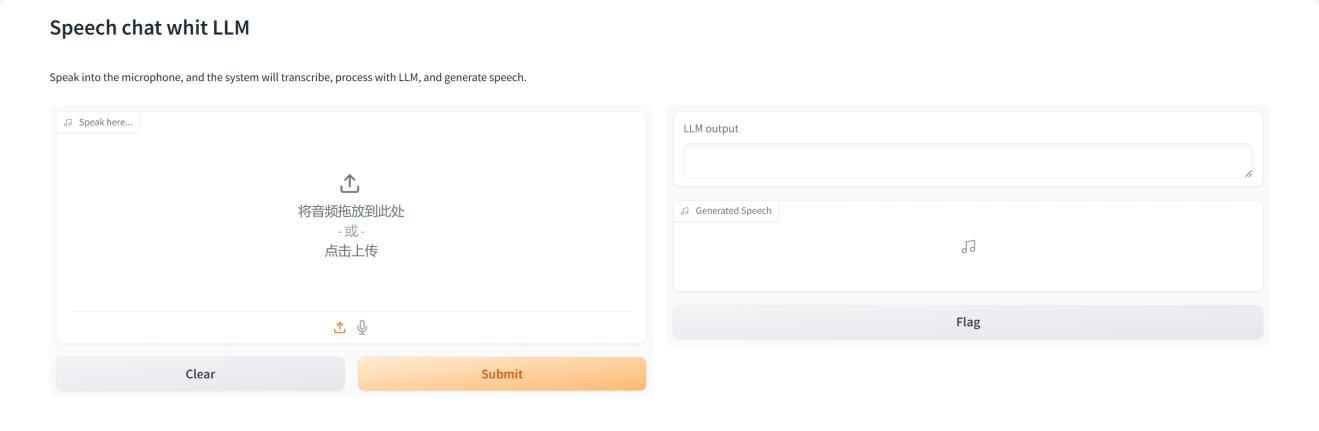
步骤二 默认是上传音频文件,我们点击右侧的麦克风图标即可切换为麦克风录音: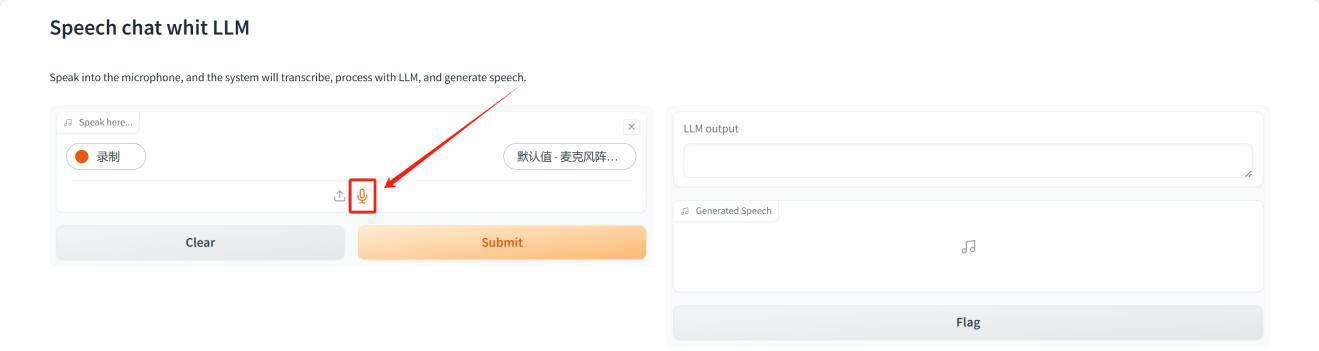
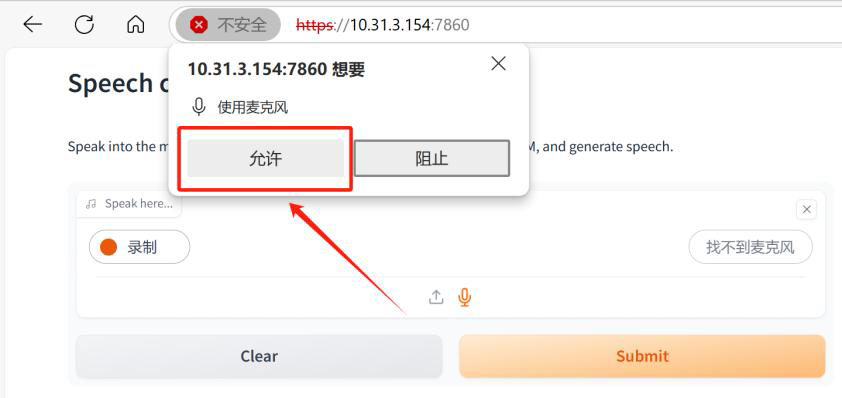
步骤三 点击录制,浏览器会询问麦克风权限,选择允许:
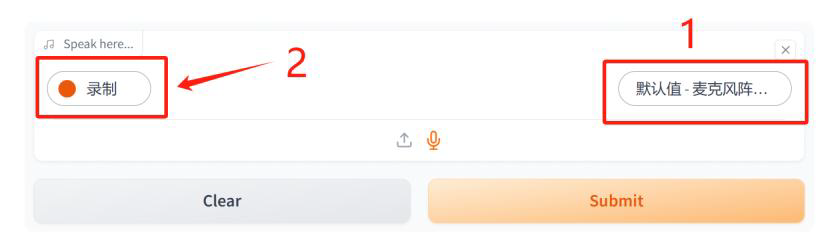
步骤四 选择正确的麦克风后点击“录制”:
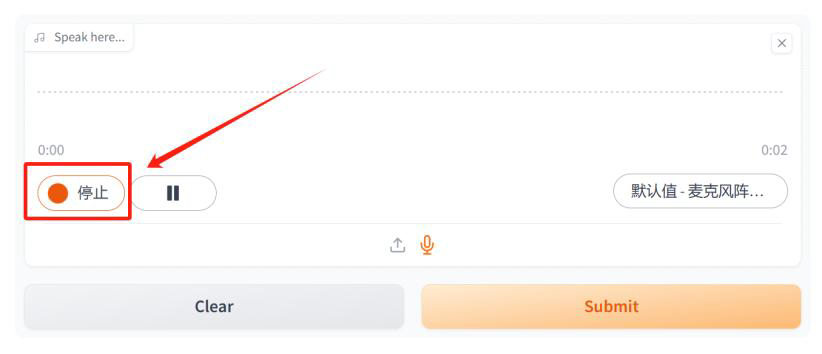
步骤五 录制完成后,点击“停止”:
步骤六 点击“Submit”,等待一会,就会在右侧打印出推理结果和音频:
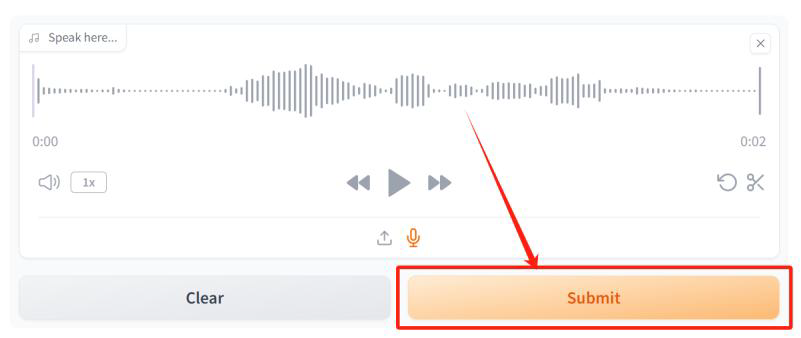
步骤七 为了体验,会先打印出大语言模型的推理结果,待TTS 模型生成语音后会在下方展示音频播放的窗口: